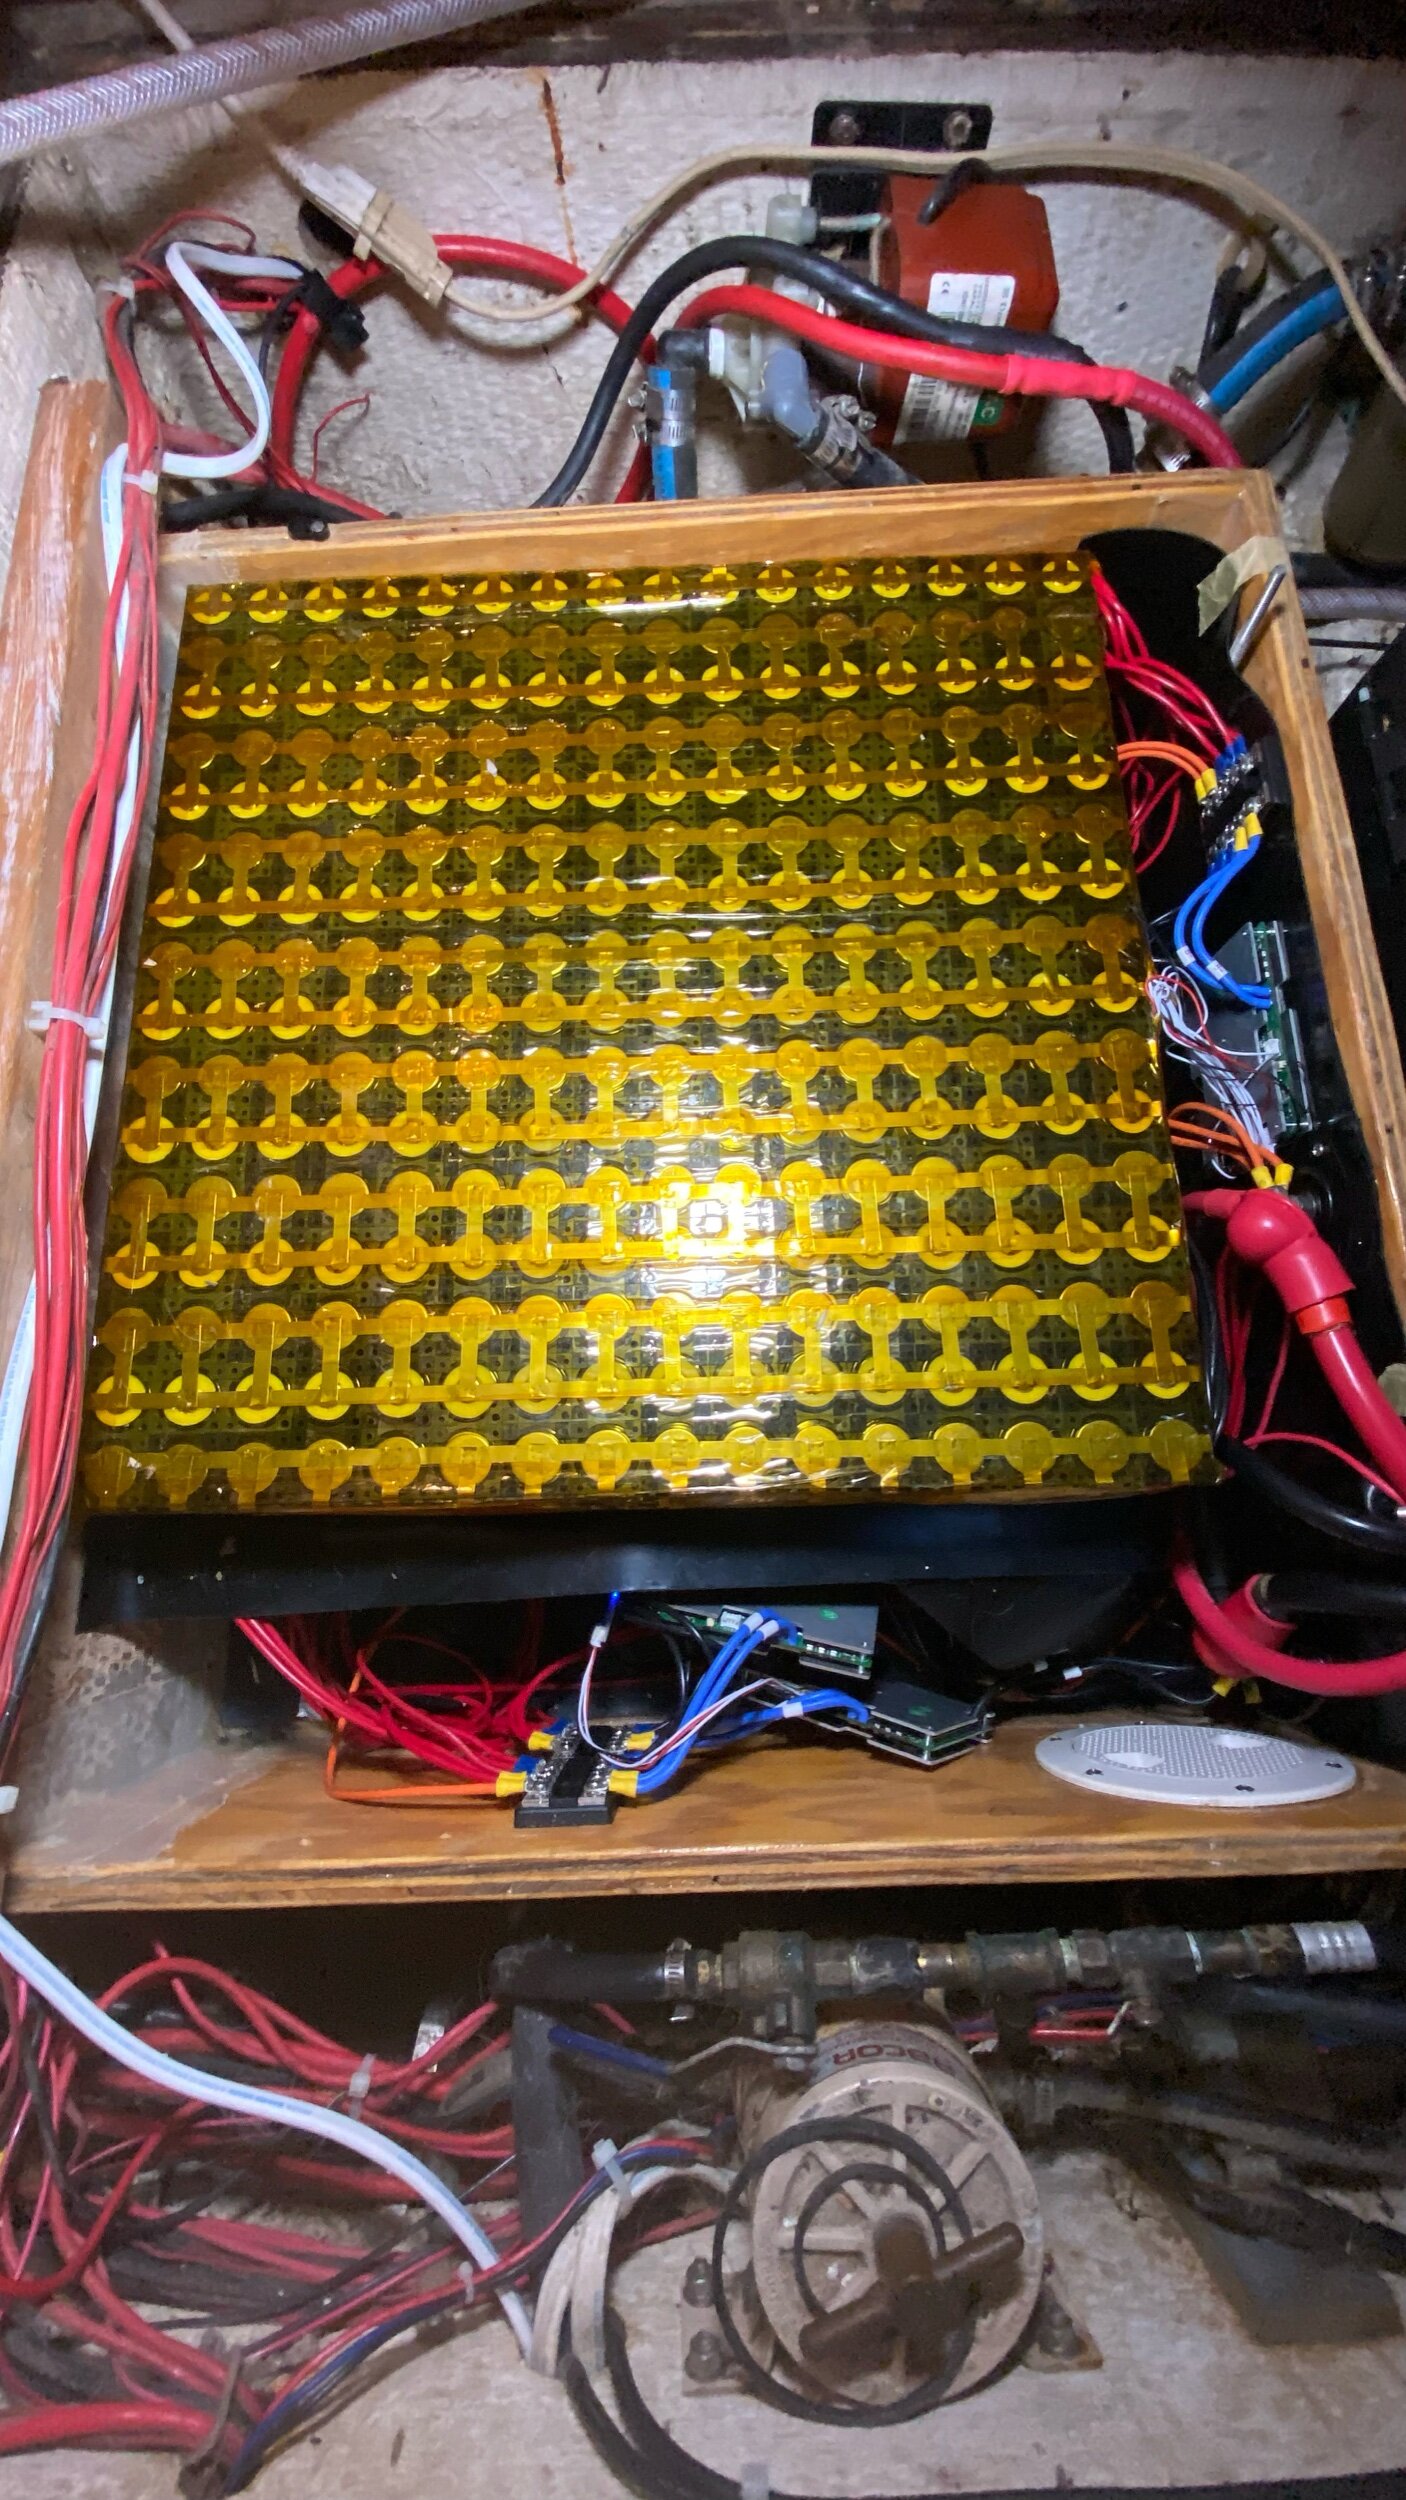
What is this Gold Tape?

Every time you see fancy electronics, they seem to be covered in a strange golden colored tape. What is it and why should you use it?

The short answer is: It is called Kapton Tape and you should cover all electrical connections with it.

Kapton tape helps to insulate the connections. This prevents accidental short circuits and shocks if something accidentally bumps into the battery! Kapton tape also helps hold everything together, keeping the entire unit sealed up as a neat and clean package.

Kapton tape is also really handy for controlling all the crazy amounts of wires that run around the battery pack for the BMS. A BMS will have one additional wire beyond the number of series connections you are using. For example, if you have a 12v battery, it will have 4 series connections and the BMS will have 5 wires. If you have a 24v battery, you will have 8 series connections and the BMS will have 9 wires. If you build a 48v battery like we did, you will have 16 series connections and the BMS will have 17 wires!

I have found that 2 inch wide tape works great giving you a good amount of coverage while still being easy to manage. The two inch wide tape also fits neatly between the cell holders allowing me to wrap the entire outer edge of the cells in Kapton tape to hold any wires or leads in place, as well as provide an extra protection to the sides of the cells.

Keeping all these wires neatly held together and safely contained inside the battery prevents them from getting snagged on something during transport or when the boat heels over and something shifts position to fall against the battery! Holding everything neatly together inside an electrically insulated pouch helps keep the battery safe for a long service life.

Cell Organization

The list of advantages of cylindrical cells over prismatic cells is pretty small. Cylindrical cells do not rely on the box to provide compression to the cell, they can charge and discharge faster, and they are smaller allowing them to be built to fit custom shaped boxes.

This last point comes in really handy when fitting lithium batteries in your sailboat!

The concept of connecting the cells together is simple. Connect the same ends of the cells together to form your parallel groups, and then connect the parallel group to the opposite charge parallel group.

In other words, hook all the positive cells together in a row making one big patch of positive connections. Then connect all the negative cells together in a row making one big negative patch of connections. Now you have a big positive and a big negative group set up in parallel, when you connect them to each other, they will now be connected in series.

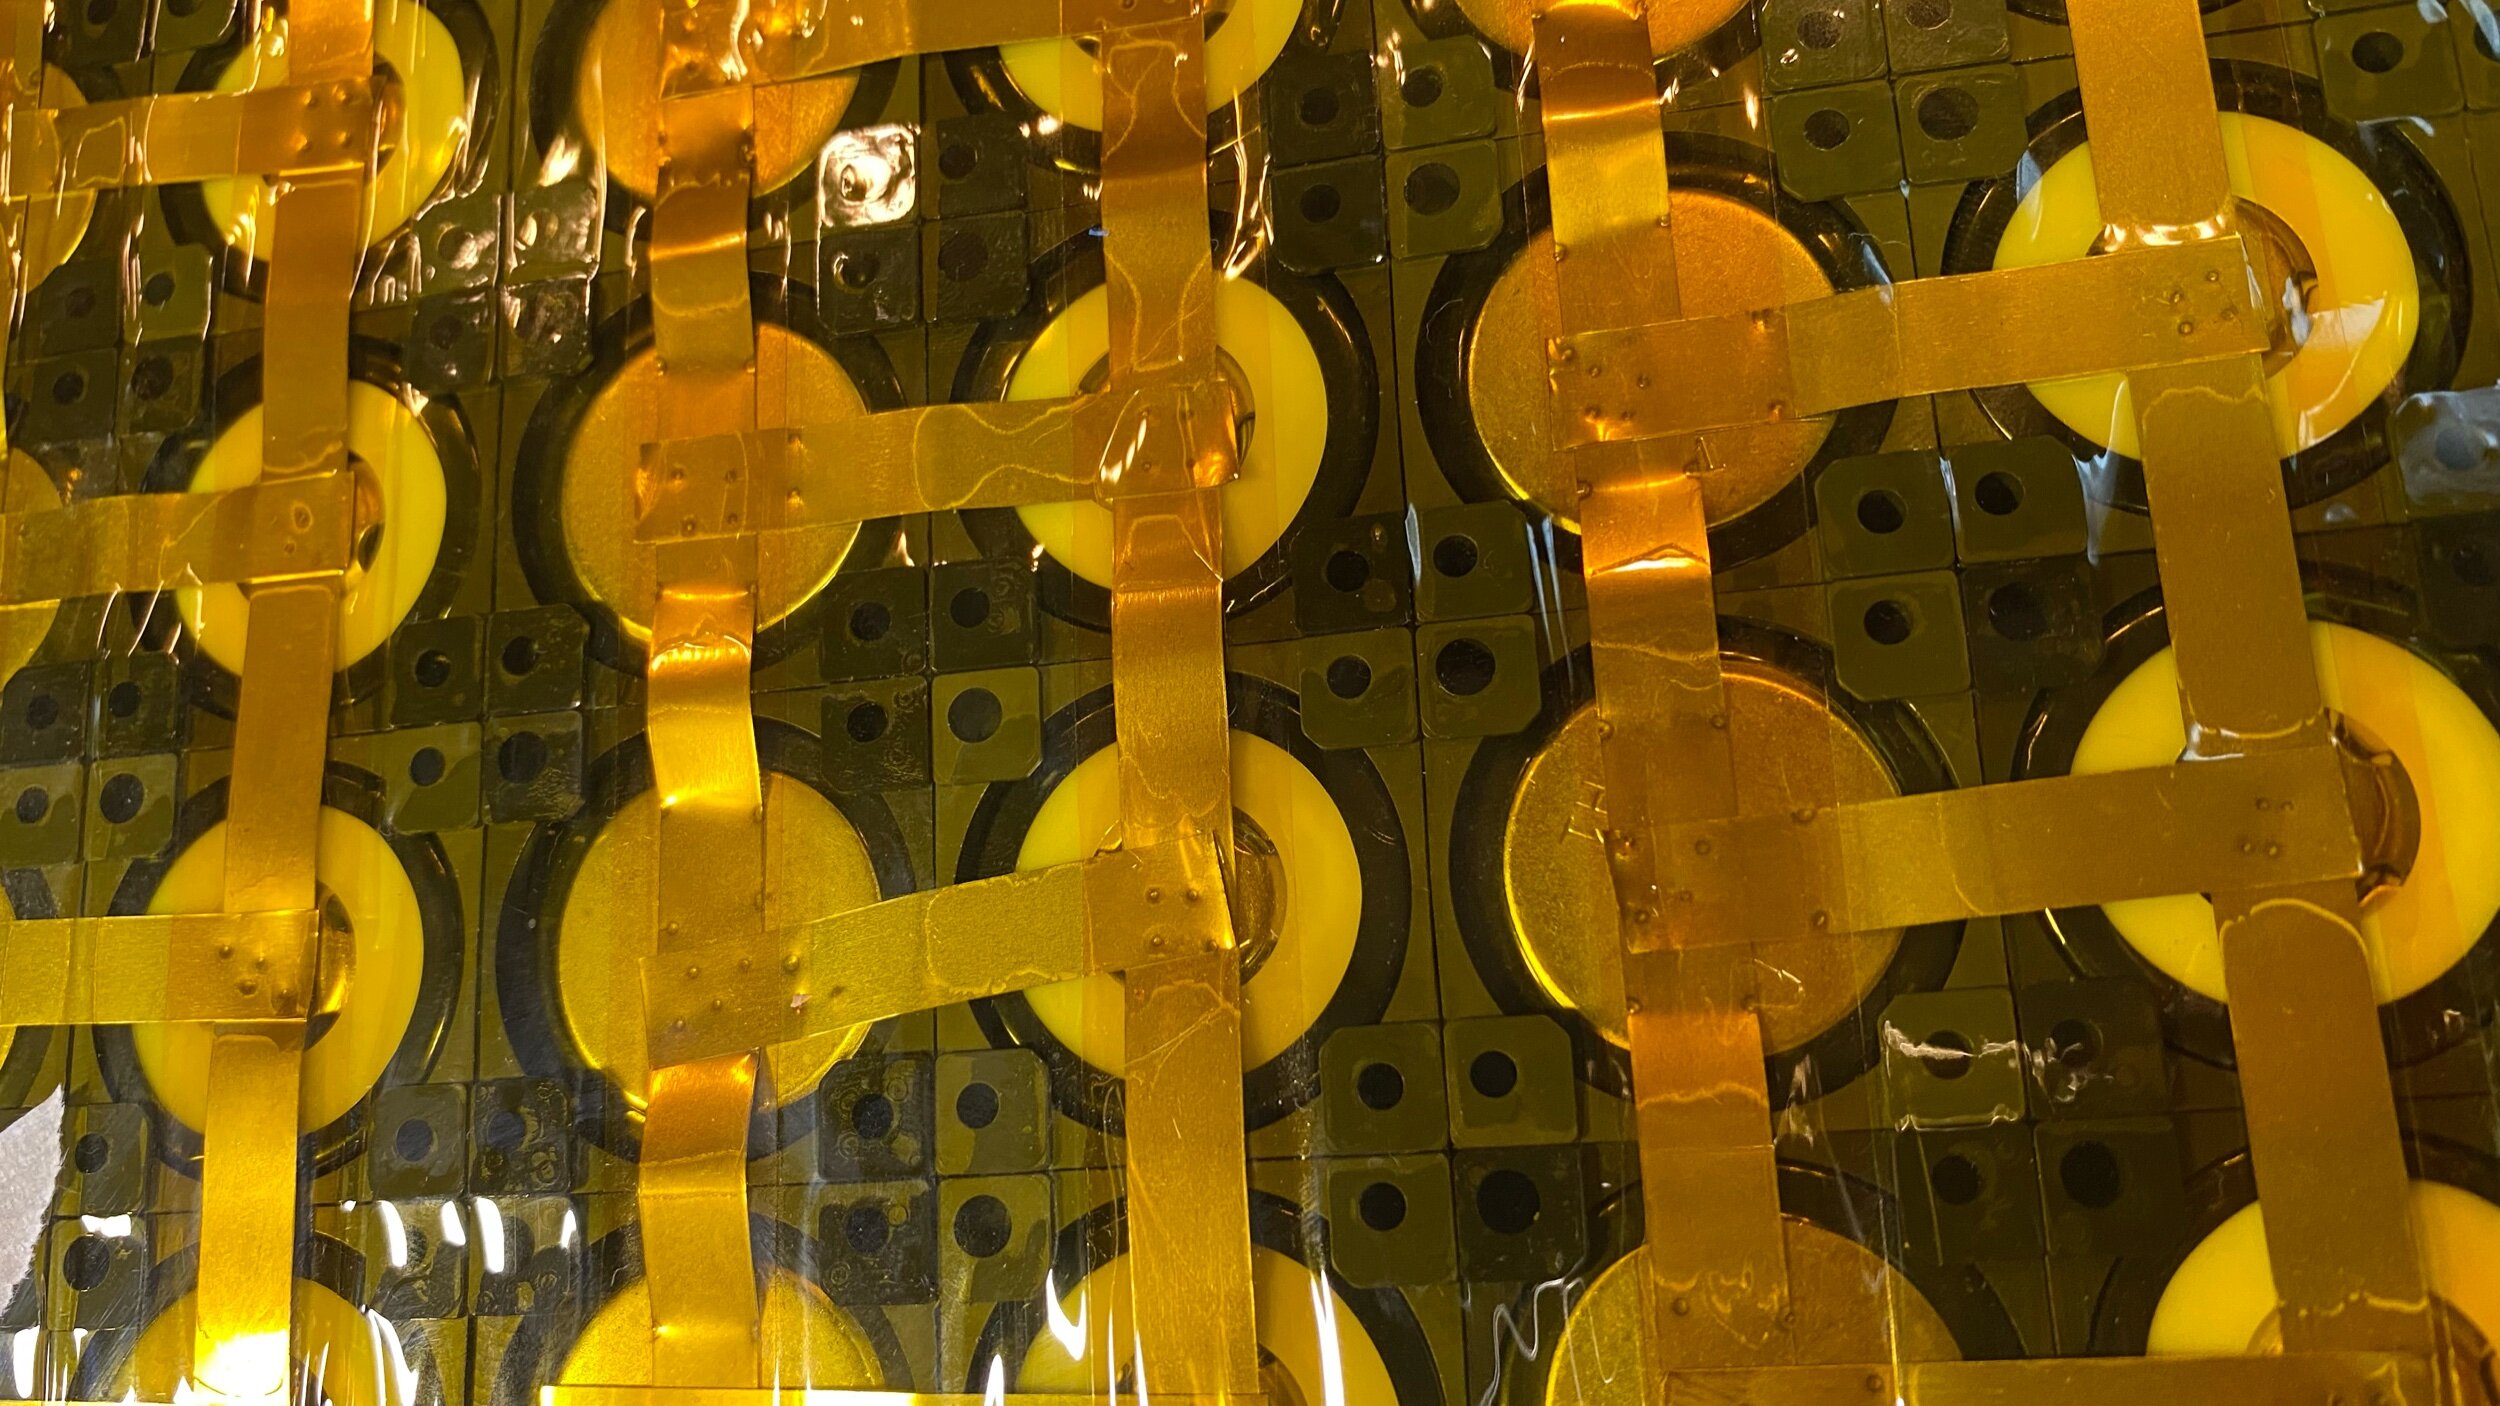
In the top picture, we were making the battery in a square shape, so the positive and negative strings are easy to visualize, as are the series connections linking the positive and negative groups together. This if fine if you are building a square battery because you have plenty of space, and if you have plenty of space, you are probably also considering a preassembled battery which will cost more than the raw components but remove all the effort of building your battery!

When you are building a battery to fit into a strangely shaped box is when the cylindrical cells shine as they allow you to fit them into unique designs.

Think of prismatic cells as a large solid rock! They are their shape and will forever be that shape, regardless of the container that they are placed in. Now think of cylindrical cells as small pebbles. Each one has its shape and will maintain that shape but since they are smaller they can pack in there much more tightly and conform to the container that they are placed in more easily.

In the square battery, the positive and negative strings are straight; running the entire length of the battery. In the strangely shaped battery, the positive and negative strings are uniquely interlaced as we fit the cells into the space allowed as best we could.

If you look closely, you will see that the square battery where all the positive and negative cells are in a line, there is only one Ni strip connecting between one positive and one negative. On the second image, the battery is not square, but will still be forced to supply the same amount of power, and this means that the same number of interconnects between the positive and negative groups needs to exist.

In the square battery, there were 16 interconnects between the positive and negative. Each interconnect can flow 5 amps giving it the ability to charge and discharge at a rate of 80 amps. The uniquely shaped battery has a bit of an issue, there are far fewer than 16 spots where a positive can connect to the neighboring negative, meaning that the Ni strips will not be able to flow the full 80 amps! To circumvent this caveat, we simply doubled up the Ni strips to bring the total number of interconnects up to 16, allowing the same 80 amps to flow across between the two parallel groups.

If you look closely, you will see some extra Ni strips that bridge the gap and add ampacity to the system, allowing us to use this uniquely shaped battery under the same parameters as the square battery.

Building the battery is only part of the process, you then need to control the battery to avoid any dangerous and explosive events that can occur when a Lithium cell becomes over or under charged. To do this, you will need a BMS or Battery Management System which protects the cells by shutting them down before they get to dangerous levels.

Monitoring and balancing your cells is an important part of Lithium batteries, but not as important as building a safe battery. Imagine if you didn’t take into consideration the ampacity of the Ni strips and ended up building a fuse rather than an interconnect. As the amps start to be drawn from the battery, the interconnects would heat up and that would place a lot of heat right over a Lithium cell. The first thing you should know about Lithium cells is that you can never expose them to heat because they could ignite!

Knowing what you are going to do with your batteries lets you build a battery that will suit those needs and as a result, allow you to build a battery that will safely provide you the power that you need and be safely managed while it provides this power.

Connecting Lithium Cells

Everyone loves math! That’s why everyone designs their own battery packs!!

To make math easier, and build exactly what you need (and not be wasteful by over building your battery), it is important to have the purpose in mind already with the needed parameters for the battery before you even begin assembling parts for said battery.

For example, say you want to build a battery for your boat to run the house loads. This is an excellent application for a lithium battery! Imagine that you turn everything on at the same time in your boat, how many amps will you be drawing?

It is important to remember that your inverter needs to be part of the calculation, and to plan on the inverter running at surge capacity, as this might happen and in that event, the battery needs to be able to manage the load.

For this example, we will think of a boat with a refrigerator, navigation lights, interior lights, and an inverter that runs the boats air conditioner. We will assign powers to these devices and say that the fridge draws 8 amps, the navigation lights draw 0.5 amps, the interior lights draw 5 amps, and the 2000W inverter draws 170 amps (250 amps at surge).

In our example, with everything turned on at the same time, the battery will be asked to provide 183.5 amps (or 263.5 amps during surge). Because electronics are always upgraded as years go by, it’s not a bad idea to factor in some reserves in this battery and call it 300 amps for the plan.

Suddenly, we have a number! 300 amps is what the battery you build needs to be able to supply at a moments notice. With this number, everything becomes a simple matter of arithmetic.

Each cell contains power, but that power can’t go anywhere without a circuit. Inside the battery, these interconnecting pieces are the secret to getting energy from your cells and into your electronics! They are typically metal bars that can flow a certain number of amps. If the bar is not big enough for the current you will asking from it, then it will turn into a fuse and burst into flames as the metal is overheated, until it burns away and breaks the connection; naturally, this is something we want to avoid!

In a previous post, I mentioned the need to decide on cylindrical vs prismatic cells. Cylindrical cells are much smaller while prismatic cells are much larger. This means that each prismatic cell will hold more power while having fewer connections to other cells. Fewer connections also means that each connection suddenly needs to carry more power!

Picture a prismatic 12v battery with a capacity of 100 amps. Each prismatic cell is 3.2v and 100ah. You would be looking at 4 cells, connected in series by 4 plates. This setup would be called a 4s1p battery as it consists of 4 groups in series of 1 group in parallel. This means that each plate will be flowing 100 amps!

Now picture a cylindrical 12v battery with the same capacity of 100 amps. Each cylindrical cell is 3.2v, same as the prismatic, but only hold 5ah. Suddenly, you will have a 20 cells in parallel to make the 100 amps, and 4 groups of them linked up in series to make the 12v battery. This arrangement is called 4s20p as you have 4 groups in series of 20 cells each hooked up in parallel. The interconnects will be a lot more plentiful here but they will still need to flow the full 100 amps.

For cylindrical cells, the common interconnect material is Ni strips. They are 8mm across and 0.15mm thick, and have an ampacity (the amount of amps that they can carry) of 5 amps. To carry the full 100 amps, you will need 20 interconnects running between the parallel groups linking in series to the next group.

This is where the work part comes into the equation, 1 big plate that you bolt on or 20 small strips of metal that need to be spot welded to the ends of the cells. How much is your time worth?

This is great, you built a battery that will be able to supply 100 amps! Excellent, except that your boat needs to be able to draw 300 amps! Either you need to build two more batteries so that each one merely gives up 100 amps at a time as they all work together, or you need to beef up your battery with its interconnects.

In the world of prismatic cells, the metal interconnect bars flow 100amps. All you need to do is place 3 stacked on top of each other so that they can flow 300 amps between the three of them. In the world of cylindrical cells, where the Ni strip flows 5 amps, you suddenly need 60 interconnects instead of just 20!

Things escalate very quickly, but the components are all the same and it’s merely the act of repeating a known process over and over to grant you the result you are looking for. By knowing what you need before you start, you will be able to build the battery that you actually need, instead of guessing and hoping that a random assembly will meet your needs.

What type of cell?

When building a Lithium Battery, there are a lot of things to consider. How much energy will the battery need to store? How quickly will that energy need to be given up? How much work do I want to do to build this battery?

All of these questions can actually be answered with one simple choice: Cell Type.

There are two main types of cells commonly used for Lithium Batteries: Cylindrical and Prismatic.

Cylindrical cells offer you the ability to make a more custom shaped battery, as each individual cell is smaller and you can pack it into custom shapes with ease! This sounds great, but to build a battery, you will need to connect all these small cells together and that is a lot of work!

Prismatic cells, on the other hand are much bigger, so each cell holds more power and this means fewer cells are going to be involved in the battery build. Fewer cells means fewer connections, which means less work! Instead of spot welding each tiny cell over and over again, all you need to do is bolt the cells together with metal plates that connect the circuit. It’s that easy!

To think about it from the standpoint of building a 12v 100ah battery: You could build it using 4 100ah prismatic cells or 80 5ah cylindrical cells. That’s 16 bolts compared to 160 spot welds!

When it comes to packaging, you really begin to see the difference between the two. Cylindrical cells are a multitude of tiny components, allowing you to connect them in any orientation that you need to fit your battery box. Prismatic on the other hand are rather large so their space form is fully dictated. You need to find a box that fits them rather than trying to fit them to a battery box.

LiFePO4 Battery Components

We have recently built our own LiFePO4 Battery to power all of our house usage as well as to power our electric motor. The switch from AGM or Lead Acid to Lithium is other-worldly!

When facing the conversion, there are two main choices you can take to make it happen. You can either buy store bought batteries that are assembled and perfect, or you can build them yourself from various components.

How do you get from a cell to a battery pole that you can hook your boat up to? Simple!

You will need: Lithium Cells, a BMS for your size of battery, and some wire! That’s it. (And then you will need a bunch of smaller items that will tie it all together)

First you will need some cells. Cells come in all different shapes and sizes, but the two main categories are cylindrical and prismatic. Cylindrical cells are, as their name implies, little cylinders. They live inside a steel casing so they have all the structural support they could need and tend to have higher discharge ratings. This means that you can such more juice more quickly out of the little cylindrical cell than you could out of a prismatic cell.

The discharge rating is denoted by the letter C. 1C is the equivalent of 1x the battery capacity. In our case with the cells shown, they are 6ah cells, so 1C would mean I could pull 6 amps out of the cell in an instant. This is where cylindrical cells shine, as they can normally operate at ratings of 3C, so this 6ah cell can give up 18 amps at a time! A prismatic cell usually maxes out at 1C, but some can go up to 2C.

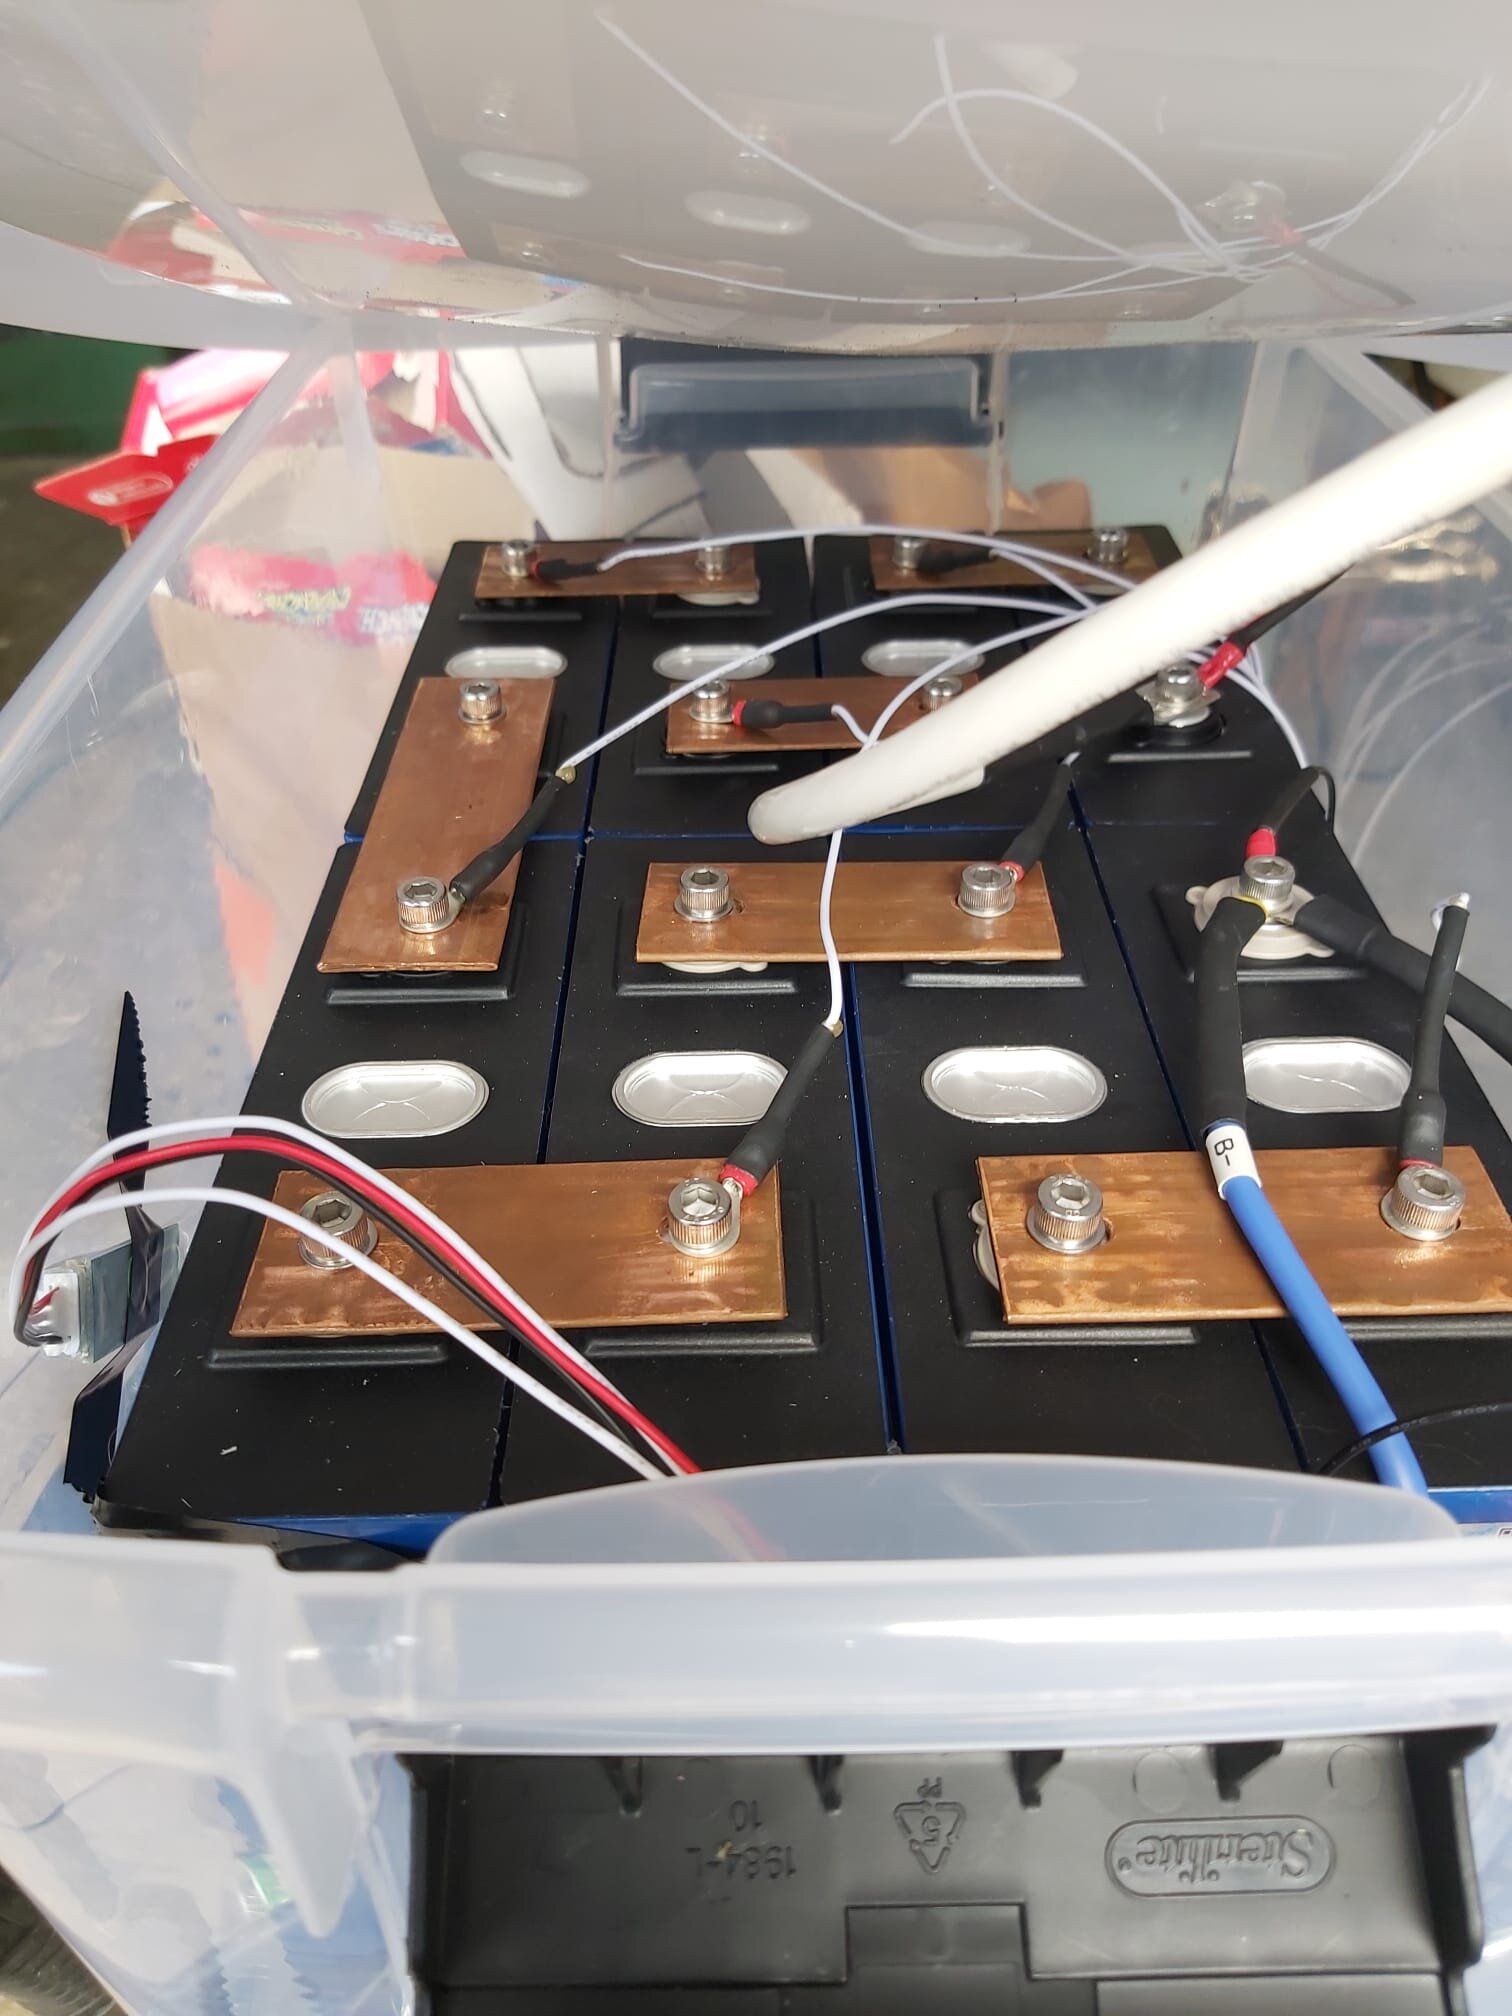
Prismatic cells are normally rectangular, and in a box (but some can be in a pouch). Their case is not always as strong as it needs to be so some need to be mounted inside a box that can compress them, otherwise they can bulge and fail.

As you can see, these prismatic cells are much larger. Being a larger cell means that they can hold more power in them and you wont need as many. A common size for prismatic cells is around 100ah, and at a 1C rating, you can pull 100 amps from them at any given point! 18 amps from a cylindrical cell seems pretty dim compared to 100 amps from a prismatic cell, but that’s where cell layout comes into play. By grouping many cells, you can up the power of the pack and have a tremendous battery that can give up a lot more energy in a short amount of time. This is especially handy for electric drives that will need lots of power in an instant while docking and maneuvering.

A 100ah battery pack in prismatic cells can give up 1C, so 100 amps; the same pack in cylindrical cells with a rating of 3C can give up 300 amps!

We chose to go with cylindrical cells because they were a little cheaper than prismatic cells and the small shape meant that we can organize them however we needed to fit them into our existing battery boxes.

To hold all of these cells together, we needed a lot of cell holders! The cylindrical cells and cell holders we used can be purchased at Battery Hookup and you can save 5% with the promo code RIGGING5 .

Once the cell holders are assembled, the cells need to be tightly inserted in the correct orientation so that they can be wired up into a massive battery.

The cells are wired up with very thin Nickle strips that are spot welded onto the ends of the batteries. This is a very tedious process that involves the constant repetition of a very simple task. Nothing about it was hard, it just involved a lot of doing the same thing over and over and over again!

We used a spot welder that we bought from Amazon as well as the spool of Ni strip which we cut to length to connect the batteries together. Links to the ones I purchased are right over there —>

For our battery build, we decided to make a 480ah battery divided into 5 packs of 96ah each. This meant that each pack contains 256 cells that all need to be interconnected and held together by 512 cell holders. We then did this 5 times!

Once everything was spot welded together, we covered the packs in Kapton Tape, which is a special tape used to prevent short circuits and helps isolate the electrical parts. It also makes it look cool with its golden-bronze color, as well as hold all the wires and stuff together. Once again, this is the exact one that I used. It’s 2 inches wide so it is big enough to cover two rows of cells in a single pass, but also small enough to be manageable! Imagine trying to use a 6 inch wide roll! It would cover the pack quickly but it would be a challenge! The same holds true for the 1/2 tape, way to small. 2 inches was the exact distance between the cell holders on the top and bottom, letting me slide the tape in there perfectly and hold all the wires in place.

The BMS or Battery Management System is a crucial part of the battery build, and honestly the biggest reason why people choose to buy a built Lithium battery instead of building their own. All those wires look pretty intimidating! The fact is, it’s really simple. I built a 48v battery out of 3.2v cells. To get to my desired voltage, I linked 16 cells in series (know as a 16s battery). The BMS has 17 wires that come out of it to hook up to the battery to check the cells and balance them if needed. Why 17 instead of 16? Because they connect to the negative side of the battery and then to each positive part on the way across the battery. In other words, start with the negative and then put the next wire on the positive all the way across the whole battery. I bought the BMS’s from Overkill Solar. They also have incredibly simple to follow instructions that will make the installation a simple procedure.

Kapton tape is great and all, but I’m a fan of added security. Being how I’m stacking the batteries in their battery box, there is a lot of potential for the tape to get chafed as we sail and short one battery to the other. To prevent this catastrophe and also to keep the batteries from sliding around much, I placed a sheet of 1/16” rubber to further isolate the two battery packs. I put one under the bottom pack as well just to act as a bit of cushion between the pack and the bottom of the box.

In the end, we built a huge battery pack which took a ton of time (2 weeks to be exact) but saved us thousands of dollars in the process! Building our batteries cost $3,100 in cells, and $5,000 for the entire project, including all the extra parts and tools we needed to purchase to make it come to life.

Lets compare to some other pre-made batteries and see what the cost savings came out to be:

Our battery build was 480ah at 48V, this translates down to 1920ah at 12V. For math simplicity, lets call it 1900ah at 12V, or nineteen 12V 100ah batteries.

Our cost was $5,000 for 19 batteries, or $263 per battery.

If we built our battery bank with Battle Born Batteries, it would have cost us $18,050.

$13,050 savings!

Renogy batteries are a little cheaper, but 19 of them would still cost us $15,200.

$10,200 in savings!

Building your own batteries is a time consuming process, not a difficult one. You simply have to weigh out the value of your time. If you can earn the savings amount and more by working your normal job for the time it takes to build the battery, its better to buy them outright. If you live a cheaper life, you can afford the luxuries of a lithium battery pack without the cost barrier.