Chainplate

Chainplate Fabrication: Part 3

To properly radius the holes of the chainplate, I use a carbide bur in a high speed hand piece followed up with an abrasive cone in a low speed hand piece.

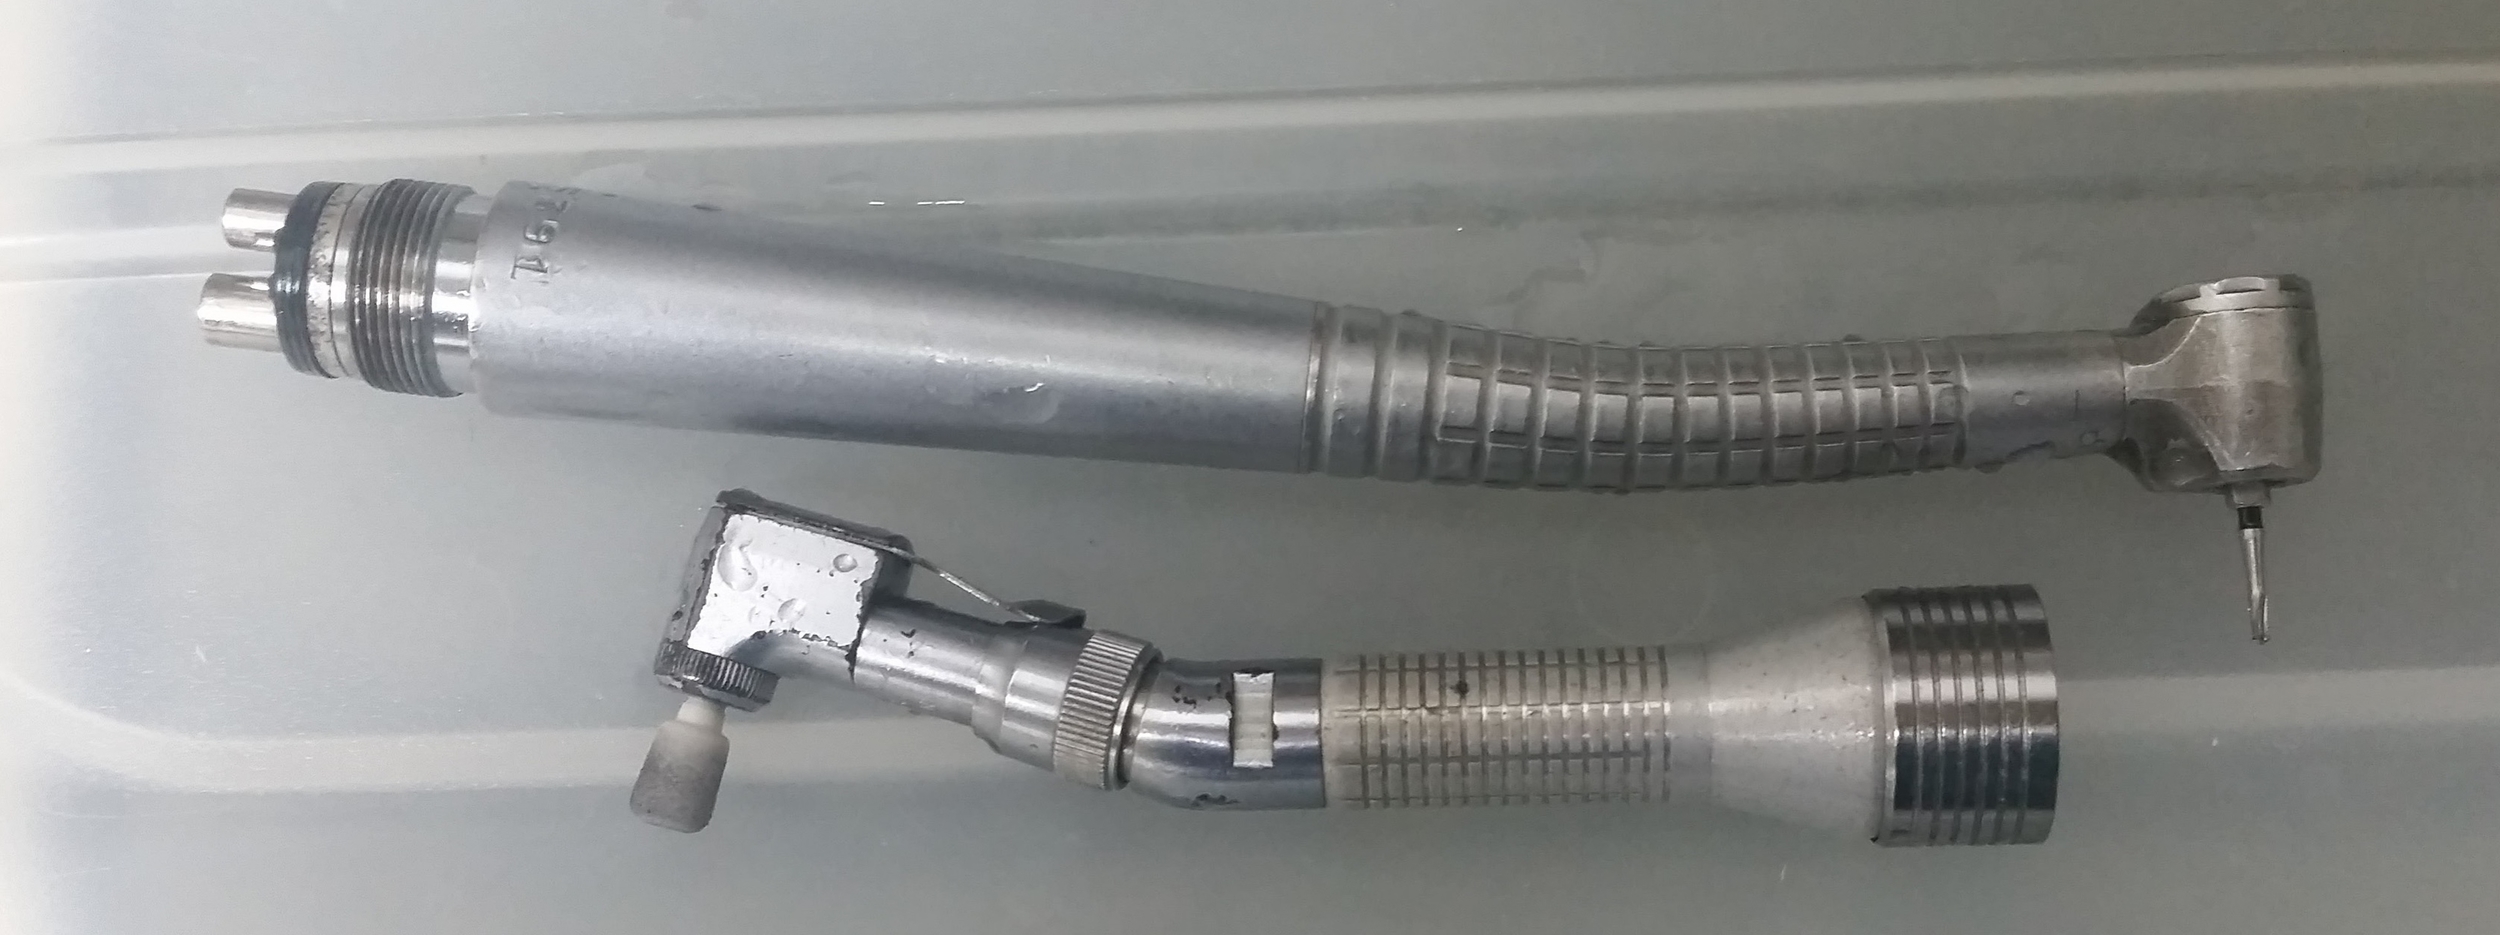
These burs will result in a smooth and rounded transition from hole to chainplate, reducing the risk of point loading on the fasteners near the corners.

With lots of water flowing over the work site, I am able to keep the whole system cool while rounding up the corners. After the course reduction was completed, finer polish was achieved with the slow speed hand piece, smoothing it all up. This step could also be completed using a dremel tool, but as a dentist, a drill is second nature and I know I can get the exact result that I need!

Now the chainplates are finished and ready to be installed with new hardware and beeded into the deck to seal out any water intrusion.

Chainplate Fabrication: Part 2

The chainplates are mostly polished after running them on the lathe. The grain in the metal is still apparent but the surface is very smooth. Further polish can be achieved if the client desires a mirrored finish. 

The corners have been radiused to reduce the risk of injury if you bump into them, now it's time to drill the holes in the chainplate.

Careful measurements have been taken and the centers of the holes have been transferred to the blank chainplate. The holes were verified by stacking the chainplate under the old template and the marks lined up with the center of the holes, proving that everything is accurate.

Once everything is confirmed perfect, the drilling may begin! There are a few important points to remember when drilling through stainless steel:

  • It is very hard
  • Heat will kill your drill bit
  • You need to keep everything lubricated
  • Drill slowly
  • Drill with very light pressure

Heat from trying to drill through stainless will cause the drill bit to lose its hardness and dull. To avoid this, you must keep things cool while drilling. To keep it all cool, set the drill press to its slowest speed and keep the drill bit lubricated.

I use transmission oil to lubricate the drill bit because it will begin to smoke if I am pushing it too fast. The oil also keeps the system from creating too much friction (and heat) and helps keep the drill bit sharp for longer. Having a shop vac at the site of drilling also helps keep the metal shavings under control. 

As soon as you start to see smoke or the area runs out of oil, stop and add some more transmission fluid to the site. 

When drilling the holes, be sure that the old chainplate is securely connected to the new chainplate with at least two C-clamps at all times. Having a third clamp will allow you to re-position the clamps without going below two clamps.

Since the old chainplate is your acoustic guide (if you are slightly off center, the drill bit will scrape the side of the old chianplate and alert you that you need to re-center the unit below the bit) you need the old chainplate to maintain itself in the exact same position. You need at least two clamps to avoid any kind of movement; if the template shifts the slightest bit, the holes will be out of alignment!

At the end of it all, you will have yourself a set of new chainplates with properly oriented holes! The next step in the manufacturing process will be to radius the holes to reduce stresses on the corners of the fastener holes.

Chainplate Fabrication: Part 1

Chainplates carry out the stressful function of connecting the stays to the hull. All of the force placed on the stays is transferred to the hull via these metal plates. Chainplates come in a variety of materials, but the most common materials are stainless steel and bronze.

In the world of stainless steel, 316L (the L stands for low carbon) is the ideal material for chainplate fabrication as they suffer the least from corrosion. 

When your chainplates succumb to the effects of crevice corrosion and stress fractures, it is time to replace them. Sailboat manufactures mass produce their chainplates at the time of production, but older sailboats need to have custom made chainplates fabricated as they are no longer in stock.

To manufacture your own chainplates, you need to locate the raw material: 316L Stainless Steel. 316L is readily available in various shapes and sizes, but for chainplates, you want to use "bar stock" or "rectangular". If you have the choice between the two, opt for "rectangular" as all the sides are sided and the metal is actually rectangular. "Bar stock" is mostly rectangular, but the edges are not completely square and you will spend a lot of time surfacing the metal instead of making your chainplates.

When you receive your metal bars, the first thing you need to do is polish them. A smoother surface is easier to spot fractures and cracks as well as being eaiser to keep corrosion at bay. To polish the metal, begin with a random orbital sander with 40 grit paper, then move up to 80 grit, then 120, then 220.

At 220, you should start to see a faint reflection in the metal. The grain of the metal will still be very present at this point but the metal will begin to shine. 

You could continue through finer and finer sand papers, but I like to switch over to a wet stone at this point. Be sure to keep the stone lubricated with a light oil such as WD-40. This will reduce friction and clear the stone of metal dust. If you work dry, the abrasives will clog almost instantly. When the oil begins to look black, I like to wipe it off and start again with clean lubricant.

After the stone, I follow up with 2000 grit sandpaper lubricated with oil. This will produce a good polish which will work as a low quality mirror. Once the metal is "as polished as it can" with oil sandpaper, I switch over to water and 2000 grit sandpaper. A gentle stream of water running over the bar will avoid the black debris characteristic of oil since it is constantly being flushed away. 

I continue polishing with the wet sandpaper until it is a better quality mirrored surface.

The "orange peel" that can be seen in the metal is caused by the grain structure of the crystalline formation of the steel. Further polishing would remove this effect, but it would take considerably more time. Mirrored chainplates are nice from an aesthetic point of view, but do not offer any additional corrosion resistance. Being how these chainplates are hidden away in a locker and in the head, the owner of this yacht was satisfied with this level of polish and fabrication continued on to the next step.

One important point to note, don't drill a single hole in the chainplate until at least this level of polish has been achieved. The sand paper used to get to this level would get torn up by all the edges of the holes. Sanding a solid and smooth surface is much easier on the abrasives.