Running Rigging

Trysail Setup

The trysail is a very small sail set in place of the main for storm conditions. It is considered one of the two sails that are never used on a sailboat, the other being the spinnaker. This is probably because people like to turn into powerboats during a storm by dropping all the sails and cranking up the engine.

The problem with this is the extreme motion of the boat during a storm is sediment in the fuel tank can become suspended in the fuel and clog the fuel filter. This is why you always hear of sailors complaining that their engine died at the worst time possible during a storm. If you were relying on your engine, then now you are adrift! Laying a hull under bare poles has been proven a horrible storm tactic, leading the boat to lay beam to the seas and usually capsizing or rolling over completely. When your engine dies in the peak of the storm is not the ideal time to raise your trysail, but at that point, you might be willing to "try" anything, even that "sail".

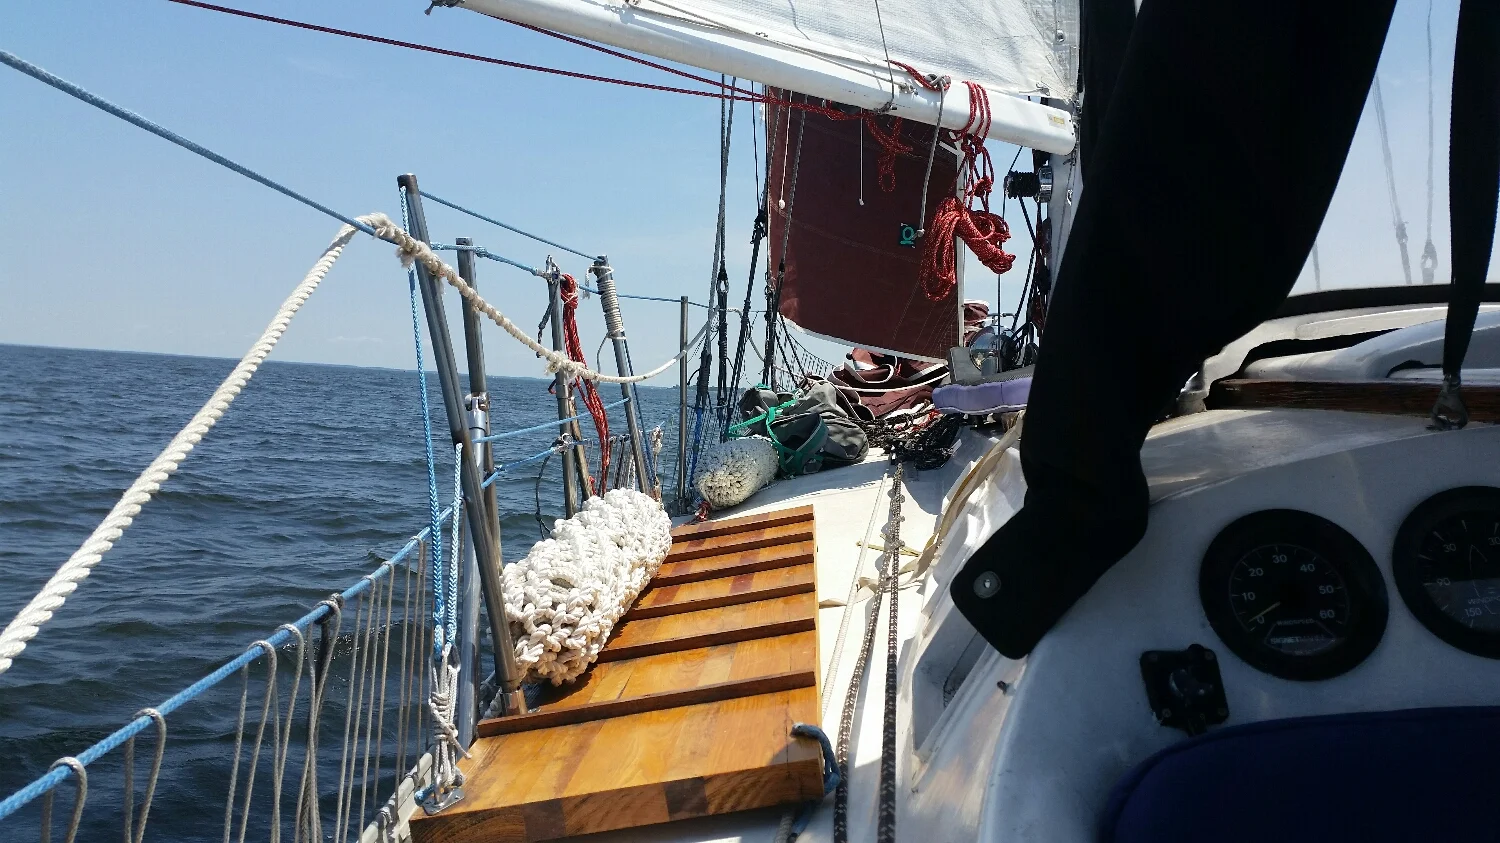
Being how we don't have the luxury of motoring during a storm (our electric motor doesn't have enough charge to power us through a long storm), we rely on our sails and have actually used the trysail a few times! As soon as we see a severe storm on the horizon heading our way, we rig our trysail. This lets us get everything ready and rigged in calm weather so we are ready for the storm as soon as it hits. 

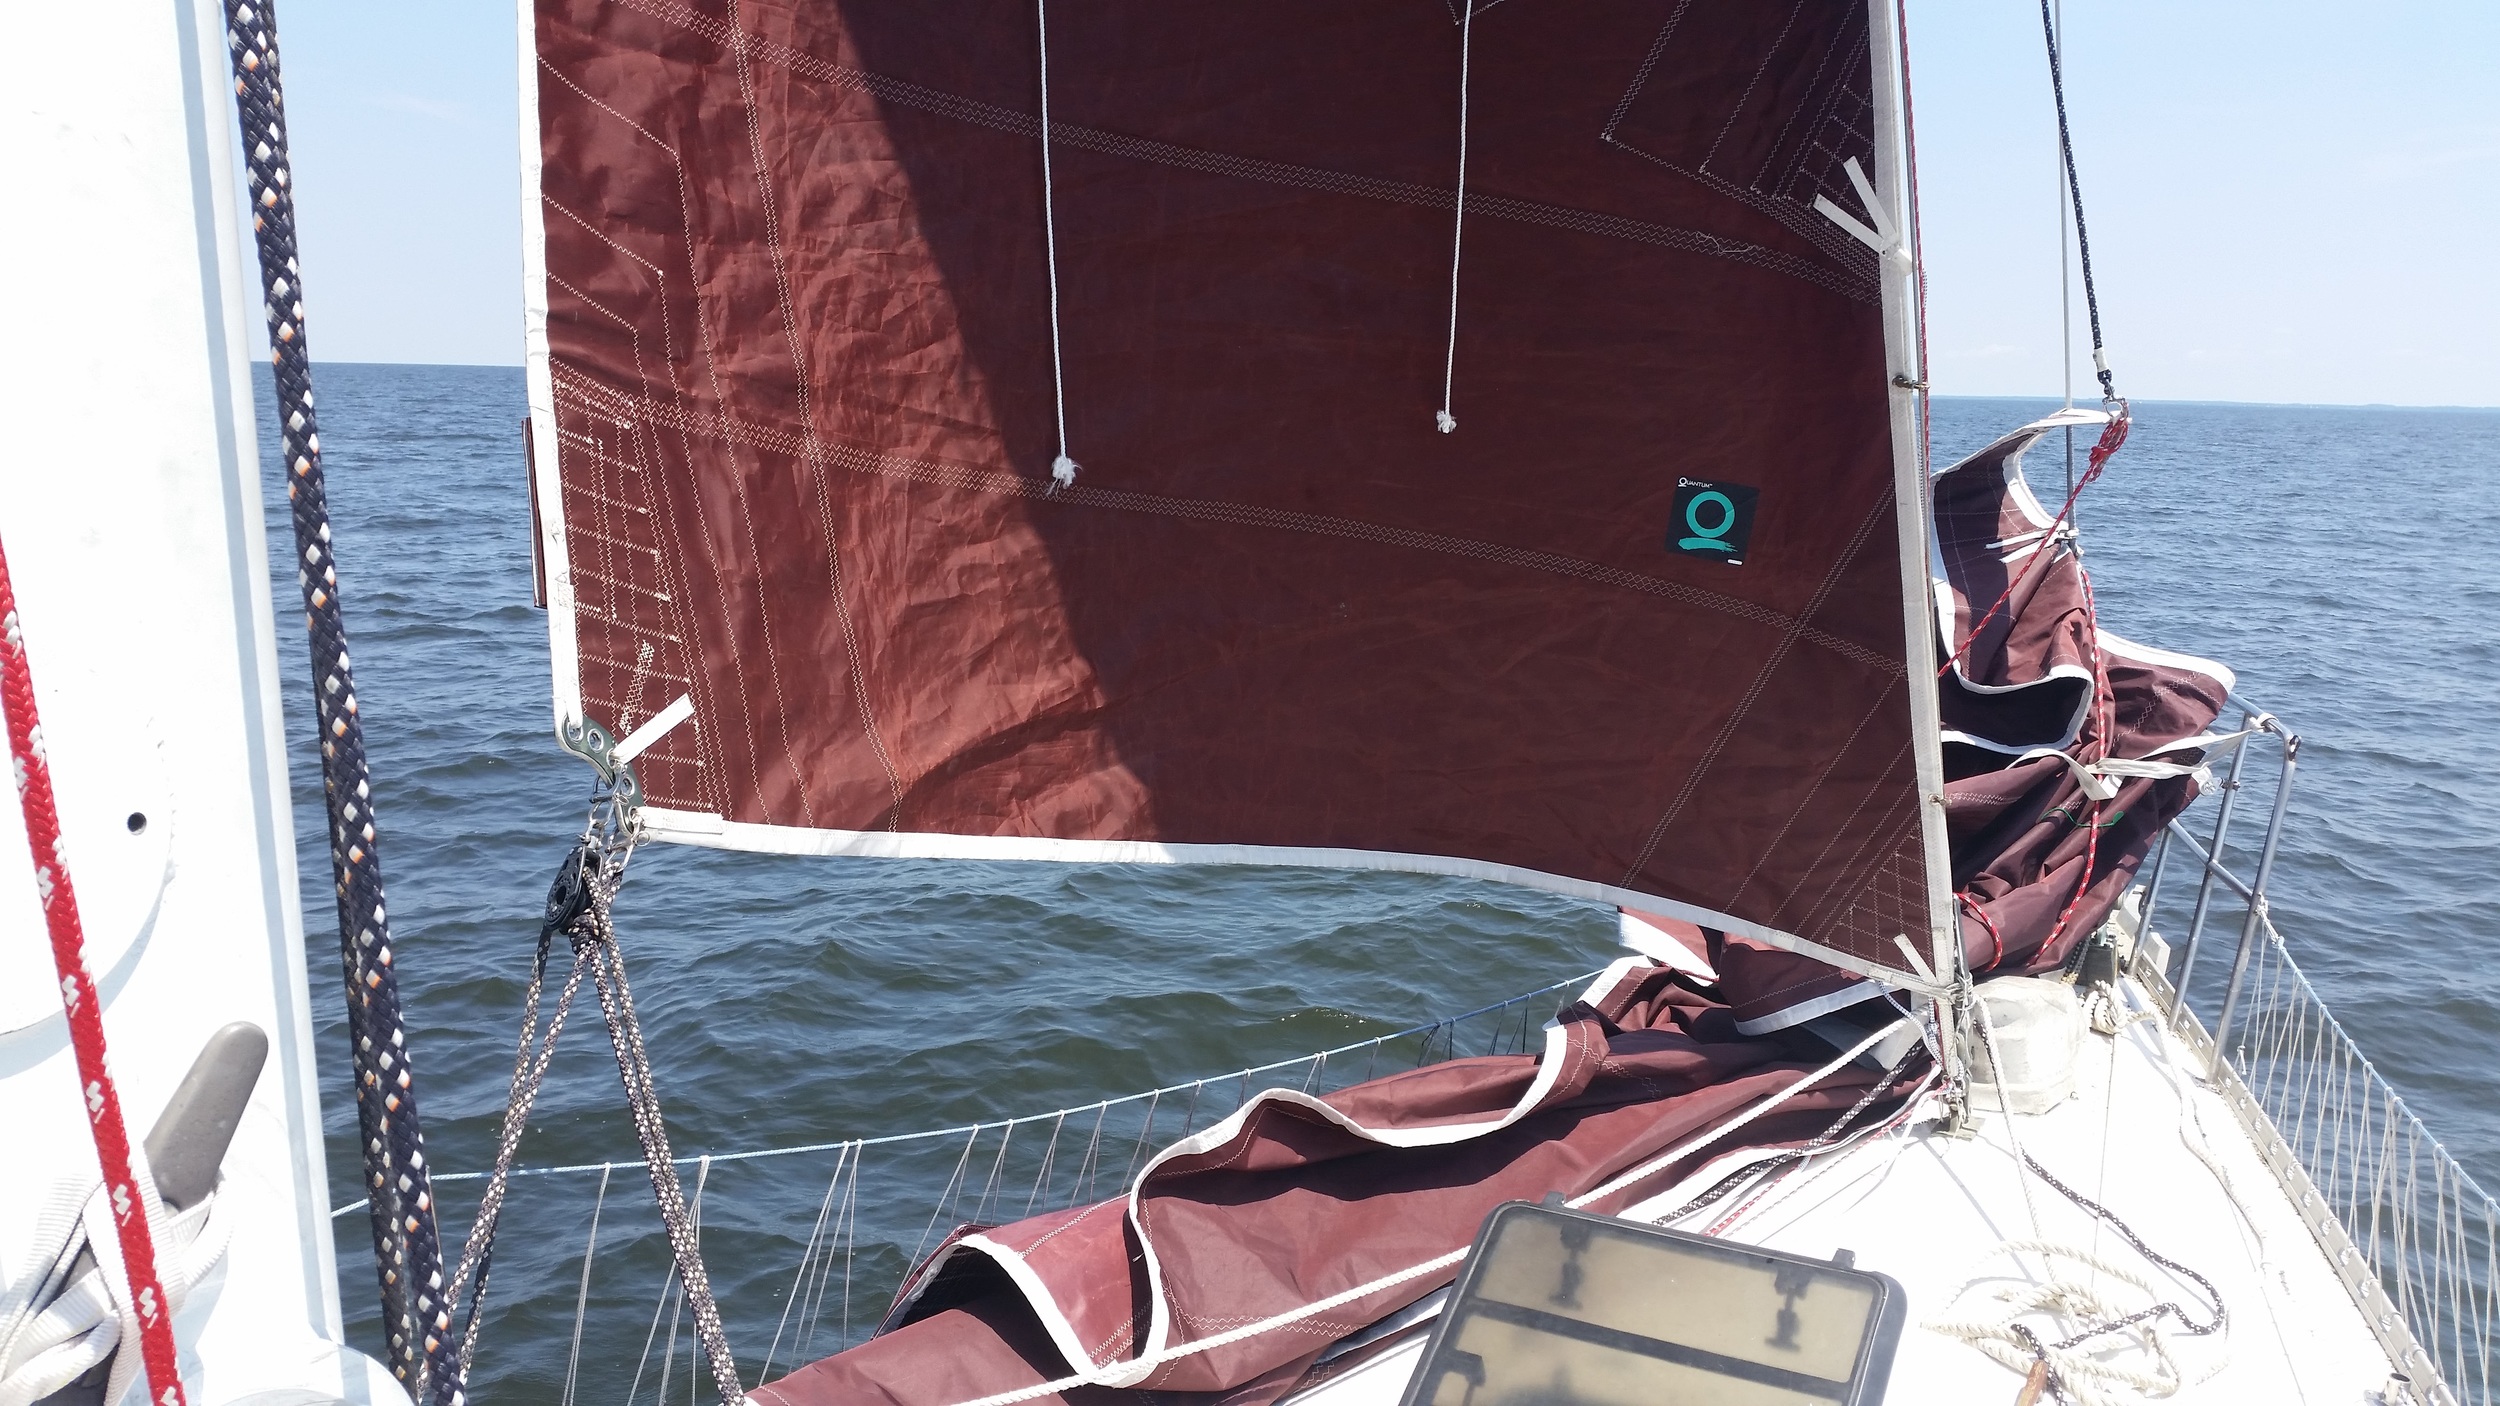
The trysail runs up its own mast track next to the mains track. This allows the trysail to be raised without removing the mainsail. 

The sheets of the trysail are run to a turning block aft, and then forward to a large sheet winch. A simple bowline tied to the clew will hold very well during the harshest of blows. 

It is important to make sure the lazy sheet is run over the boom and not under it. When it is led over the boom, the sail is able to switch to the other side without issue. If the sheet is led under the boom, the boom will interfere with the sails ability to be on the opposite tack.

The trysail has fallen out of favor by most sailors who state that they could more easily tuck in a third or fourth reef into their mainsail than to rig up a trysail. This is a true statement, trysails take some time to rig in fair weather (before the storm) and could be nearly impossible to rig during a strong blow! 

Trysails do have their place though, as they are made out of much heavier sail cloth and are purpose built to weather out a storm. This means that your mainsail is not subjected to all the wear and tear of a storm. If your deeply reefed main were to tear or rip during the storm, you would have no mainsail once the storm has passed. If you tear or rip your trysail during a storm, your main is still untouched and ready to hoist once conditions improve!

The other advantage of a trysail in a heavy blow is it takes the boom out of the equation. Jibing the main can be an eventful occurrence in heavy wind. The boat will heel over greatly and the boom will slam to the other side as it falls past the midship point! Accidental jibes due to wind shifts or purely accident are risky and dangerous during high wind situations. The trysail takes the boom out of the equation and lets you jibe it as easily as you jibe your jib! Simply turn the boat, loosen the windward sheet and tension the leeward sheet; it takes all the fear and noise out of storm sailing. 

On a final note, the storm trysail has less going on than a reefed main, which translated into less to break during the storm. The sheet is tied to the clew, run to a turning block and set on a strong winch. Any snags or problems are easy to identify and straightforward to correct. 


Barber Hauler Setup

The process of setting up a barber haul is very simple, all you need is a snatch block!

On a beam to broad reach, the headsail is eased, causing it to twist and loose efficiency. 

The first step is to ease the headsail until there is slack in the line but not so much that the sail begins to flog. This will reduce the tension on the sheet, allowing you to place it into the snapshackle by hand. Then sheet the sail back in and trim to the apparent wind.

Now the headsail is able to hold a better sail shape, resulting in higher efficiency and more speed through the water. 

With the better sail shape, you can reach your downwind mark in less time and more comfort!

Snubber

Anchor snubbers are a very important, yet over looked part of ground tackle. Ground tackle, in its simplest form, is the equipment needed to attach the boat to the bottom in a secure manner. 

Most people think of this being anchor and rode. When the rode is rope, this can be the extent of the gear required.  

The rope will offer elasticity in the system, reducing the shock of the boat rising and falling back during rough anchoring conditions.  

When all chain rode is used, as it is preferred due to the increased weight and reduced risk of chafe, more equipment must be included to make the ground tackle system work properly. 

All chain rode offers no direct elasticity, as the chain will not stretch when pulled. It does offer some indirect elasticity, thanks to catenary, which is the parabolic curve that forms in the chain as it travels from your bow roller to the anchor. As the boat pulls back from a large wave pushing on the vessel, the chain will be pulled back under tension. This force them needs to lift the chain up, reducing the catenary as the chain becomes a straight bar. Once the wave passes, the chain will fall once again and catenary will develop again, losing the potential battery for the next shock.  

If the force exceeds the stored elasticity in the catenary chain, a strong lurch of incredible force will develop as the boat is snapped by the taught rode. All of this force can dislodge the anchor, causing it to drag, and damage the deck gear.  

Chain stoppers are easily bent by this amount of load, and risk ripping or if the deck if overloaded. If no chain stopper is present, all of this load is transferred to the windlass gypsy, running the risk of damaging the gypsy and the gearing inside. 

If the bow roller is open, the chain can also fall out of the roller and cause serious damage as it saws on other parts of the boat. If the roller is captive,the chain will not be able to escape, but the forces on the roller are still extremely high!  

The solution to the chains downfall is to use a nylon snubber. The nylon snubber offers the elasticity of nylon rode while the strength and weight of chain is still present everywhere else. The last section, connecting the rode to the boat is then completed in nylon rope.  

The nylon snubber is attached to the chain rode and to the bow cleats, which are very strong and ate designed to take such abuse.  

upload.jpg

If the catenary chain is drawn taught, the snubber will still protect all the deck gear while offering elasticity and avoiding the shock load. This also helps ensure the anchor is not lurched and un-set. 

Bow roller design is also unimportant, as the snubbers takes over the last connection to the bow. Open rollers are no longer at risk of losing the chain. Captive rollers are no longer at risk of being bent.  This is all thanks to the nylon snubber.  


upload.jpg

As the boat swings around, the nylon snubber pulls on the rode and transfers the force to the cleats. The section of chain between the windlass, chain stopper, and roller, are all slack since all the tension is diverted to the lines of the snubber. 

When it comes to snubbers, I have seen many different styles, but I prefer the simplest for a few reasons that I will go over.  

Connecting the snubber to the chain can be done by chain hook or by knot. Chain hooks are uncredited convenient, simply slip it on the chain as it runs out and cleat the other end. The chain is instantly captured at the end of the snubber. The problem is the hook can easily slip of the chain, rendering the snubber ineffective.  Some companies, like Mantus, have come up with chain hooks that can not easily slip off to negate this problem. The fact that they came up with a better chain hook means that chain hooks were slipping off enough to need improving.  

I prefer to tie a knot at the end of my snubber. A good knot will not slip off of the chain like a chain hook, and will hold securely until untied. I prefer a magnus hitch for my snubber since I use both tails, but a rolling hitches would also work.  

One last advantage to tying the snubber is you result with two tails. A chain hook only has one tail. This means that a chain hook snubber will pull the boat towards the side the snubber is run through. If it runs through the port chock, the boat will be pulled so that the port side is facing the wind and seas. This also means that all the force is directed onto that one chock and cleat. 

When tied, there are two tails, meaning two snubber lines! The lines can be set equally so that the resulting pull is even and the boat faces the weather bow on. This also reduces the force on each snubber line by half, as the load is now shared between both lines. 

On a final note, snubbers should be made of Three Stand Nylon, not double braid nylon. Double braid is not as elastic as three stand, and in a situation where elasticity is desired, choosing the least elastic option would be silly.  

My snubber is 3/4 inch three strand nylon tied with a magnus hitch and secured with both bow cleats, forming a bridle to the chain rode. This may seem like overkill, but it holds us through all sorts of weather and is easy to untie when we are ready to leave.  

upload.jpg

Until then, we know our ground tackle is well set. 

Barber Haul Effectiveness

upload.jpg

While on a broad reach, the staysail is eased and the clew hooks back towards the staysail tracks on the deck. At the same time, the leech twists and spills the air out of the top of the sail. This all leads to decreased efficiency in the sail and less speed through the water.

By simply rigging a barber hauler, all of these problems can be corrected.  

upload.jpg

The barber hauler pulls the clew out towards the rail, and removes twist from the leech of the sail. Now the sail can be properly set to use the air on a broad reach in the most efficient way possible. 

When the winds are light, this added efficiency means you can continue moving at a reasonable pace instead of seeing the iron genoa! In our case, we were moving at 2.5kn under main and staysail. This may seem way too slow for most, which is what motivated us to rig the barber hauler. Once the barber hauler was set up, we began moving at 3.5kn. Still slow by most standards, but we were still moving under just sail with out the use of a motor.  

When it is blowing harder, we don't set up the barber hauler because we are moving fast enough and we don't feel the need to improve the sails efficiency.  

Reefing Tack Line

​Most mainsail reefing involves a tack hook and clew line to secure the reefed foot of the sail. Reef hooks are very secure and strong and offer little risk of allowing the sail to slip off.

The way they work is you slip the tack cringle over the hook and then haul in on the halyard to secure it. This works well on small light sails, but heavy sail cloth and/or high winds can make it nearly impossible to reach the hook. For this reason, tack straps have become a wonderful solution, aiding the sailor in securing the tack. A webbing strap with a ring hangs down and can easily be hooked onto the rams horn. Once secured, the halyard is hauled in and the sail is raised. This secures the tack in its reefed position.

While tack hooks are a standard, they do have a significant problem: they are hooks!

A flaked mainsail can easily lie under the tack hook, and if raised quickly, it can be pierced by the hook. This will create a puncture in the luff if you stop instantly, or a large tear if you raise the sail before you realize what is going on.

I personally pierced my old sail three times on my old tack hook. The last thing I wanted in my new laminate mainsail were luff punctures, so the hook had to go! This led to my current and very sail friendly tack setup, a tack line.

upload.jpg

I used a length of dyneema (regular, not heat set SK75) for my tack line, and another length tied to the reefing tack points on the sail. The length of dyneema is tied to the goose neck on a strong attachment point with a bowline ready to connect to the sail.

On the sail, I tied a very fancy series of knots to the reefing tack points. The first set of knots is an interlocking double fishermans knot. This keeps loops from coming apart when the tack is loaded. The tails are then further knotted into the loops to ensure that these knots will never come undone!

I did not make grommets for these locations because grommets bulk up the loop considerably and I was concerned that they would be overly stressed passing through the tack ring and decided to simply tie a strong knot and keep the bulk of line passing through the ring reduced.

I tie the tack line tail to the loop via a sheet bend with a slip. If you do not include a slip, you will be hard pressed to untie the bend knot after a stormy sail. The slip gives you the ability to pull the knot apart if you are unable to untie it in a timely manner.

The sheet bend has a tendency to slip out, which is why considerable care should be taken to make sure that it becomes fully tightened as the sail is raised. If you see the knot slipping, simply tighten it a bit more and continue raising the sail. It will become incredibly tight as the winch pulls the sail into position and will not come untied under any situation!

Shaking the reef out literally becomes a matter of shaking the knot out, and raising the sail all the way.

This method makes reefing hardware very safe for your sails and provides a very secure method to attach your reefed tack point.